

Exporting notebooks from an institutional account (i.e. your University of Otago account) to another account is currently not supported by OneNote, as this is only supported on personal Microsoft 365 accounts.
There are a few workarounds available, but some extra effort may be required. For the best method for your situation, refer to the flowchart below:
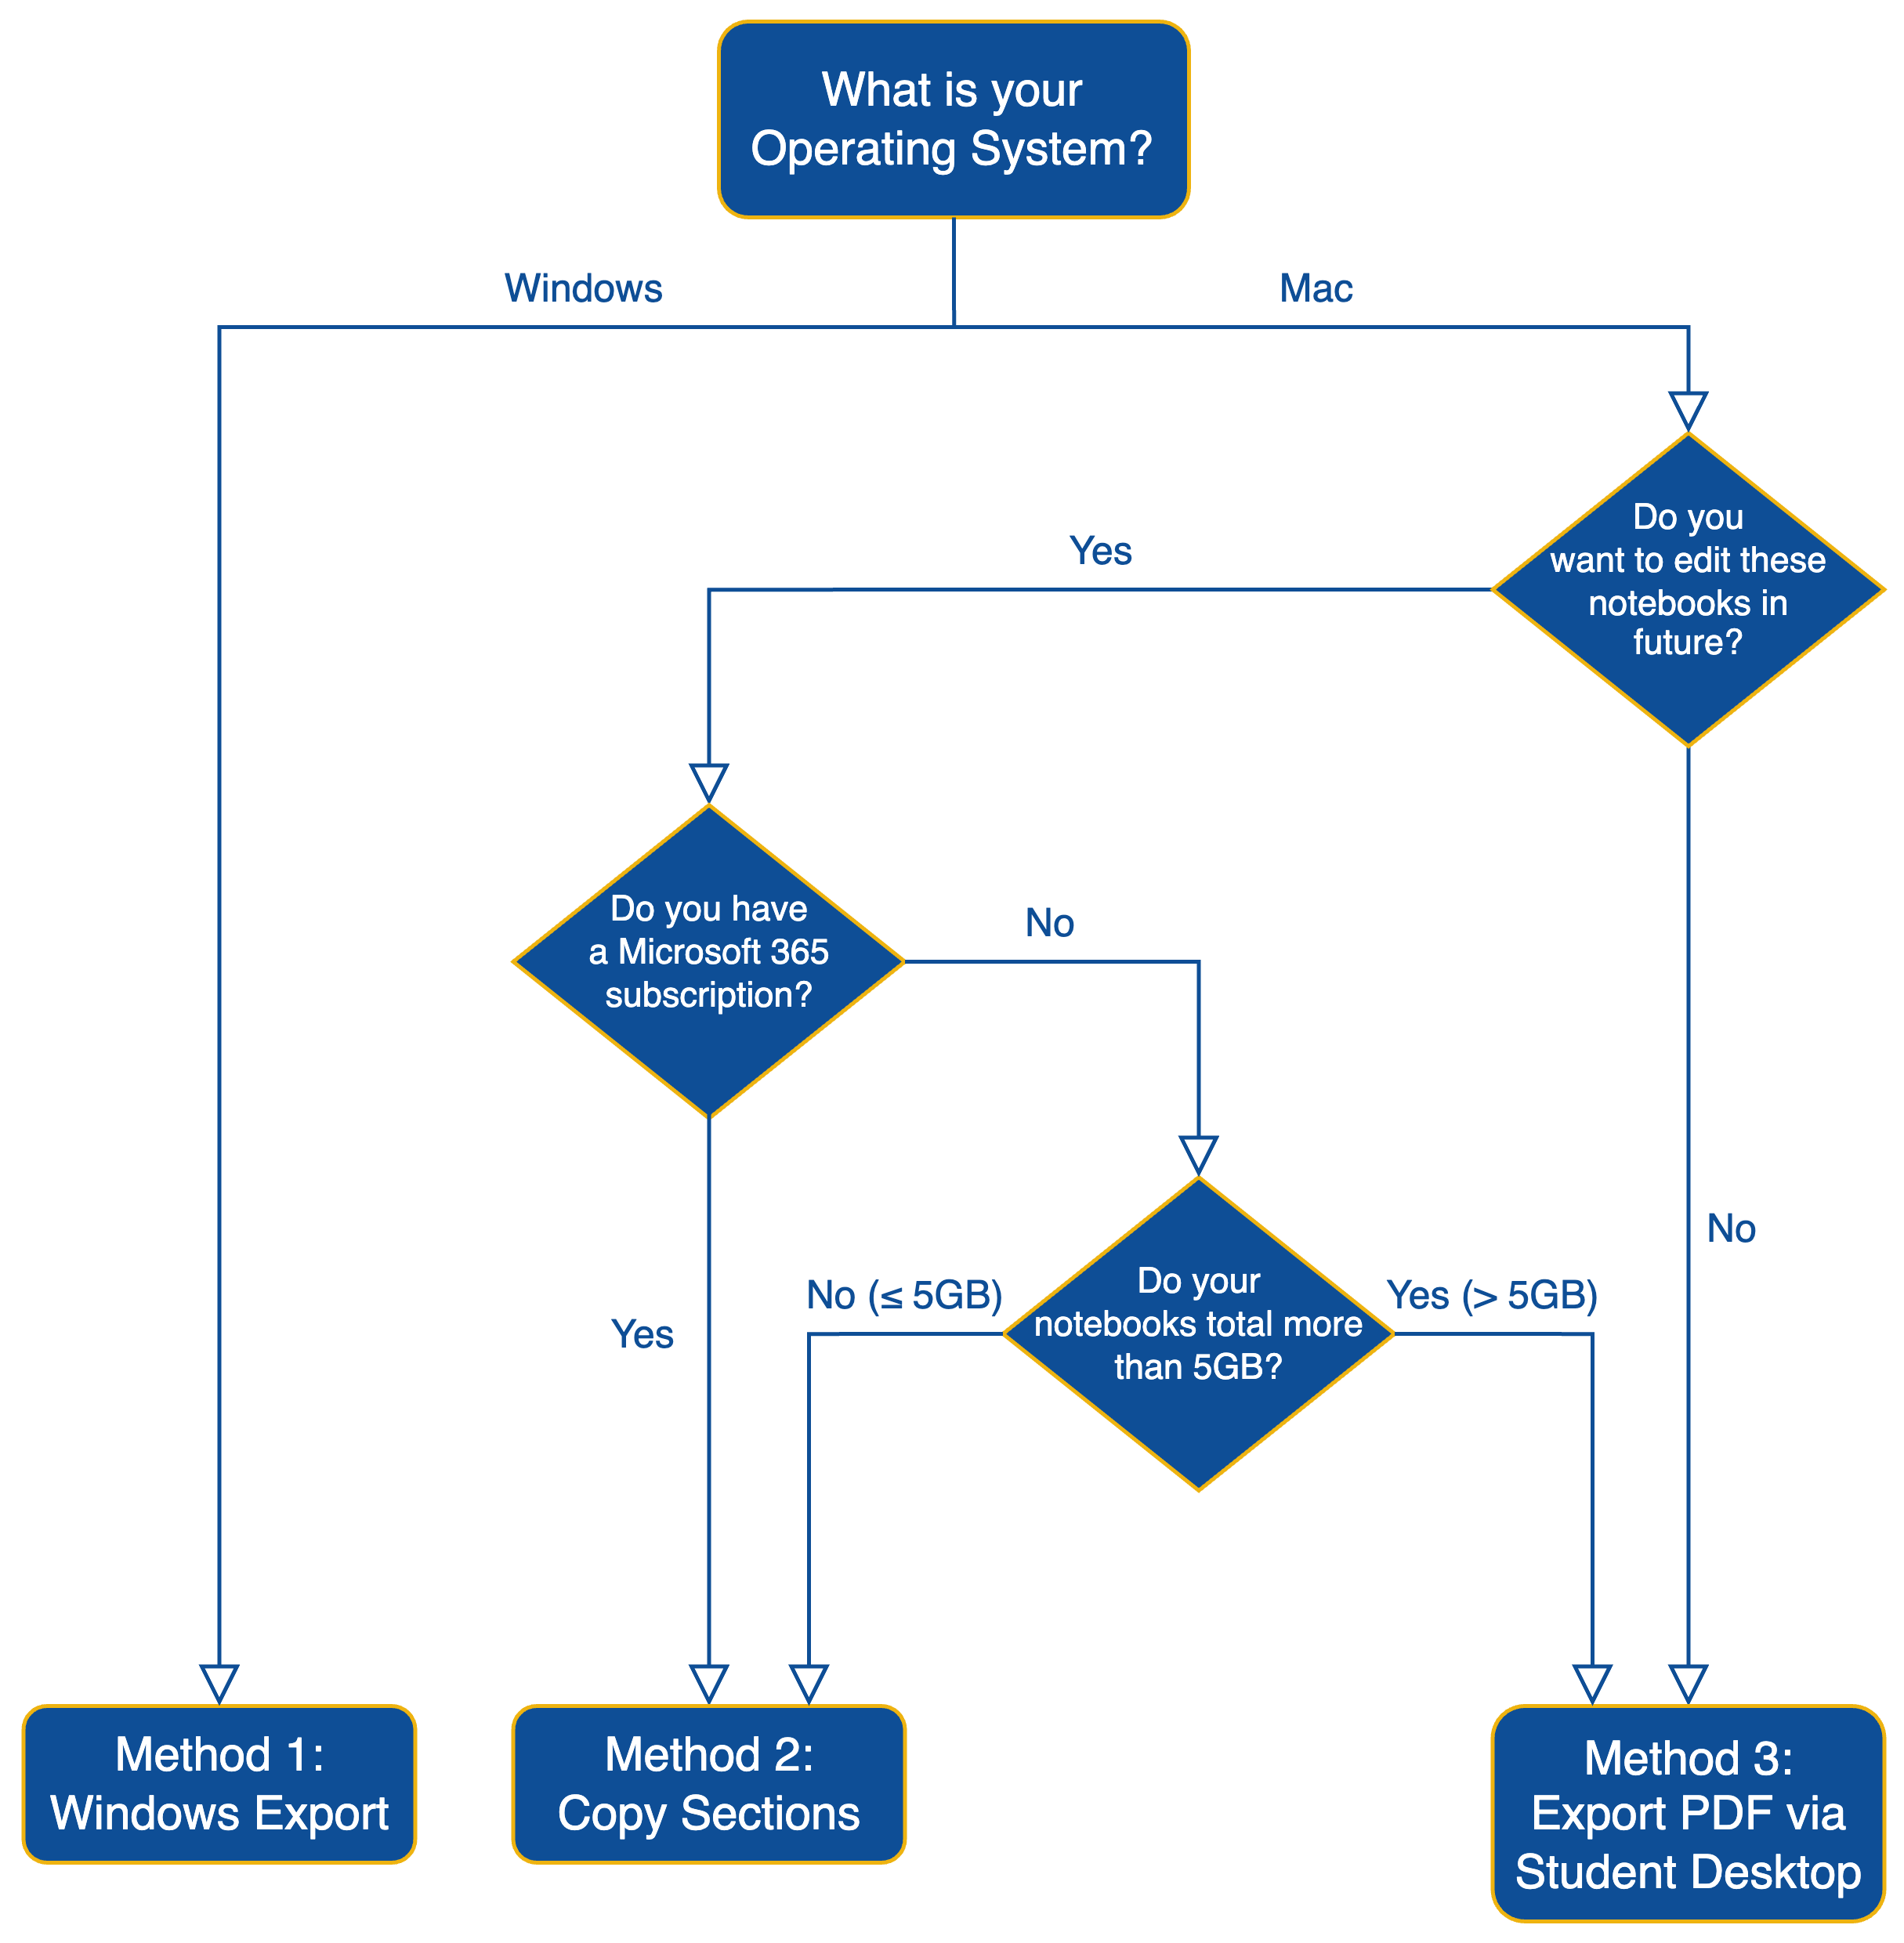
Method 1: Windows Export
If you are on a Windows device, you will be able to export your notebook over to a new account by first compressing it into a OneNote Package.
There are two versions of OneNote available on Windows, OneNote for Windows 10 and the Microsoft 365 version just called OneNote. For this method, you will need to use the OneNote application. If you currently use OneNote for Windows 10, download the Microsoft 365 version: https://www.onenote.com/download
For an explanation of the different versions, refer to the Microsoft Support article: What's the difference between the OneNote versions?
After installing OneNote, sign in to your account and wait for your notebook to finish syncing. If your notebook is large, this may take a while.
To export your notebook:
- Open the notebook to be transferred.
- Go to File > Export.
- Select Notebook and OneNote Package (*.onepkg). If you do not need to edit your notebook, you may alternatively choose to export as a PDF.
- Click Export and choose a location.
To unpack this notebook:
- Locate the OneNote Package you have exported.
- Double-click the file to open it.
- Under Path, select Browse to select a new location for your notebook.
- If you are moving notebooks off your student account, make sure this is not set to your student OneDrive. You can choose either a location on your device or select the OneDrive folder of a different account.
- Click Create and your notebook will automatically open in this new location.
When you open OneNote again, you will notice you have two notebooks with the same name. To close the original notebook:
- Go to File > Info.
- A list of notebooks will appear with file locations. Find the notebook you wish to close. If you are moving notebooks off your student account, this will be the file path starting with: https://otagouni-my.sharepoint.com/
- Click Settings next to the notebook and choose Close.
When opening OneNote, you will now only be shown the version that has been moved to its new location.
Method 2: Copy Sections
The Mac version of OneNote does not have the option to export notebooks, so notes need to be copied over instead. Using this method, entire sections can be moved rather than individual pages.
Because the Mac version of OneNote does not store local copies, it is not possible to store your notebook on your device. Your notebook will need to be moved to a new OneDrive location. If you are moving your notebook off your student account to a personal OneDrive, free Microsoft accounts only have 5GB of storage space. If your notebook takes up more space than this, you may need to purchase a OneDrive subscription. It is also possible to store your notebook across multiple free accounts, but this is not recommended.
To check the size of your notebooks:
- Sign in to OneDrive online
- Go to My files.
- Locate your notebook; this may be under the folder Notebooks.
- Click the three dots next to your notebook and choose Details.
- Select More details.
- The size of your notebook will be listed under Size.
To move sections between accounts:
- Open OneNote for Mac.
- Click on your initials/profile picture in the bottom-left.
- Click the + next to Connected Services.
- Sign in to the account you wish to transfer your notebook to. Both accounts should be signed in.
- Go to File > New Notebook…
- Give your notebook a title and colour. Under Where, ensure this is set to the destination OneDrive. If you are moving notebooks off your student account to a personal account, this should be OneDrive — Personal.
- Open your original notebook.
- On each section, right click and choose Move Section to…
- Select your new destination notebook and click Move.
- Repeat this for all sections. When you are finished, right-click your old notebook and choose Close this notebook.
Once this process is finished, it is recommended that you sign out of your old account to avoid accidentally creating new notes here.
Method 3: Export PDF via Apps at Otago
Apps at Otago will allow you to load OneNote in a Windows environment to export your notebooks. You can access Apps at Otago from your own device, or from a computer in computer lab. If you are no longer a student, you may need to borrow a friend's Windows device or use a public computer.
For more information on accessing Apps at Otago, refer to the related article: Access Apps at Otago
To export to PDF:
- Sign in to Apps at Otago.
- Open OneNote.
- Sign in to your account and wait for your notebook to sync.
- Go to File > Export.
- Select Notebook and PDF (*.pdf).
- Click Export and choose a location.
Retrieving the PDF on your own device
If you are using another device:
- Sign in to OneDrive online on the Windows device.
- Drag and drop the exported PDF into OneDrive.
- Sign in to OneDrive again on your own device.
- Download the PDF.
If you require any assistance transferring your OneNote notebooks, contact AskOtago.